

Showing posts with label animals. Show all posts
Showing posts with label animals. Show all posts
Monday, June 17, 2013

Monday, April 23, 2012
New Lanky Friends
I'd like to introduce a couple of new-comers to my Lanky Friends series:


 |
| Sir Hare |
 |
| Lady Duckness And now, all of this sunshine calls for a Garden Party! |


Tuesday, April 26, 2011
Little Mr. Tuffet

Big Louie likes to visit me occasionally while I'm at work in the studio. I thought it would be nice to create a special spot for him.
I'd been inspired by the Hassock in Elizabeth Abernathy's winter Nuno Magazine (page 50). As much as I was craving to dip-dye an old wool blanket, add some embroidery to it, and create a stunningly lovely hassock, that project will have to wait for another day when I have more time. Instead, I opted for the instant gratification method. I dug out an old, semi-felted rainbow sweater (huge!). I cut two large circles for the top and bottom, and a wide band to sew around for the sides. I used two bags of tiny scraps left over from sewing projects for the stuffing (and a handful of dried catnip!).


A new tuffet!

Monday, April 4, 2011
Adding to the Flock
I decided to try a little realism while making a recent plush. Sweetie's birthday was coming up, and he has a little collection of duck decoys.

I'd found this folk-art duck pattern at a thrift shop and thought it would be fun to make a stuffed decoy.

I wasn't satisfied with the pattern as it was, so I flipped through the bird field-guide and couldn't resist trying to make this loon.

I reduced and re-drew the folk-art pattern to make it look more loon-like.

I'm so pleased with the results! Sweetie likes it, too.

And speaking of ducks, I finally stitched up this pre-printed duck I picked up awhile ago at Knittn' Kitten.

I love these pre-printed patterns, especially the sort of realistic looking ones. I buy them whenever I find them at thrift stores. The nice ones are rare enough that it's a bit of excitement when I find one.

There's something about this duck that is neat and strange at the same time. I'm saving the second one to use flat as an applique element. ('though it is tempting to sew up another one of these goofy ducks!)
Thursday, February 10, 2011
A Tardy Arrival to the New Year
Welcome!

I'm finally sewing something special for myself. This is a soon-to-be appliqued sleeve for a hemp-hoodie-wrap-thingie. Mmmm...my favorite color: brown!

I've been exploring new directions with my plush-making.

...as well as continuing production with some tried-and-trues (the ever-lovin' Mitts for Musing).

Some things work better if they sit around for awhile, partially made, waiting for their true final forms to be revealed.

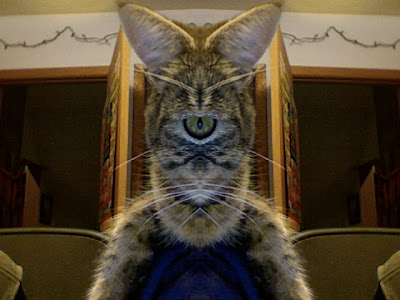
Louie sez "Mrrrrow". (He's my cuddle muse).
Friday, October 16, 2009
Harvest Reds
 The past few years I've really enjoyed growing these Polish Linguisa tomatoes. They're a large, pepper-shaped paste tomato. The young plants look pretty spindly and frail, and they're some of the last ones to start setting fruit, but once they get going, they're quite prolific, and continue to ripen their tomatoes up until frost.
My favorite way to prepare them is to slow-roast them in a 200 deg. oven all day, until they're leathery-soft. Then I layer them in a pint jar with fresh basil leaves and olive oil, squishing them down well to get the air bubbles out, fitting in as many as I can into the jar. They keep several months in the 'fridge. The flavor is so exquisite that they're usually consumed by merely spreading them on toast.
The golden tomato is an Orange Oxheart, another favorite of ours. The flesh is firm and sweet, nearly the color of a peach, with a complex, smoky flavor. This year our Orange Oxheart plant was rather sickly, and its fruits somewhat mealy and meager. Generally, though, this is a dependable, delicious tomato.
I grew these three varieties of chili peppers this year.
The past few years I've really enjoyed growing these Polish Linguisa tomatoes. They're a large, pepper-shaped paste tomato. The young plants look pretty spindly and frail, and they're some of the last ones to start setting fruit, but once they get going, they're quite prolific, and continue to ripen their tomatoes up until frost.
My favorite way to prepare them is to slow-roast them in a 200 deg. oven all day, until they're leathery-soft. Then I layer them in a pint jar with fresh basil leaves and olive oil, squishing them down well to get the air bubbles out, fitting in as many as I can into the jar. They keep several months in the 'fridge. The flavor is so exquisite that they're usually consumed by merely spreading them on toast.
The golden tomato is an Orange Oxheart, another favorite of ours. The flesh is firm and sweet, nearly the color of a peach, with a complex, smoky flavor. This year our Orange Oxheart plant was rather sickly, and its fruits somewhat mealy and meager. Generally, though, this is a dependable, delicious tomato.
I grew these three varieties of chili peppers this year.
 The long, shapely ones are Cayennes. The medium-sized ones are Thai Dragons, a good standby for these parts. They always bear much fruit & ripen well. I'm not sure what type the tiny ones are; they're suuuper hot. They're about the size of my pinky fingernail, and even just one of these peppers in a dish really heats it up. The plant is smallish and covered with tiny, red peppers.
I plant my chili pepper plants in pots, so I can move them around to the warmest sunny spots during the summer, and then when the weather cools, I bring them into the house or greenhouse to finish ripening.
The long, shapely ones are Cayennes. The medium-sized ones are Thai Dragons, a good standby for these parts. They always bear much fruit & ripen well. I'm not sure what type the tiny ones are; they're suuuper hot. They're about the size of my pinky fingernail, and even just one of these peppers in a dish really heats it up. The plant is smallish and covered with tiny, red peppers.
I plant my chili pepper plants in pots, so I can move them around to the warmest sunny spots during the summer, and then when the weather cools, I bring them into the house or greenhouse to finish ripening.
 This year I'm drying my chilies, but sometimes I pickle them in half-pint jars. This batch has five different varieties in it! Those leaves in there are mint leaves.
I make a super easy and yummy hot-sauce by opening a jar of my pickled chili-peppers and whizzing the entire contents in the food processor. The result is a vinegary, thin hot pepper sauce perfect for dripping on anything that needs pepping up.
I can't resist sharing this photo with you.
This year I'm drying my chilies, but sometimes I pickle them in half-pint jars. This batch has five different varieties in it! Those leaves in there are mint leaves.
I make a super easy and yummy hot-sauce by opening a jar of my pickled chili-peppers and whizzing the entire contents in the food processor. The result is a vinegary, thin hot pepper sauce perfect for dripping on anything that needs pepping up.
I can't resist sharing this photo with you.
 I took it just before sunset, after I'd finished harvesting and cleaning out the winter squash bet. Mmmm....I see many pumpkin pies in the future....
I've been wanting to introduce you to the ducks, but they're quite shy about getting their picture taken.
I took it just before sunset, after I'd finished harvesting and cleaning out the winter squash bet. Mmmm....I see many pumpkin pies in the future....
I've been wanting to introduce you to the ducks, but they're quite shy about getting their picture taken. Here they are so busy nibbling lettuce seed in the garden that they didn't notice me with the camera. The brown duck is a Khaki Campbell named Peep. The two Black Runners are Lady and Sir Ernie Longneck.
I kinda' have to coerce them into the garden, but once I get them in there, they get into foraging and eating slugs. Probably their favorite garden treat is Brussels Sprouts. They like the leaves and love the sprouts. It can be quite a game, me shooing them away from the Brussels Sprouts bed, them scooting & clucking around the garden, only to return to the Brussels, me chasing them again....gotta love them quackers.
Here they are so busy nibbling lettuce seed in the garden that they didn't notice me with the camera. The brown duck is a Khaki Campbell named Peep. The two Black Runners are Lady and Sir Ernie Longneck.
I kinda' have to coerce them into the garden, but once I get them in there, they get into foraging and eating slugs. Probably their favorite garden treat is Brussels Sprouts. They like the leaves and love the sprouts. It can be quite a game, me shooing them away from the Brussels Sprouts bed, them scooting & clucking around the garden, only to return to the Brussels, me chasing them again....gotta love them quackers.
Thursday, June 4, 2009
Green Man Lurking
I've noticed a mysterious stranger lurking amongst the plants, lately.
 He seems kinda shy.
 I find him rather hot.

L.B. is not impressed.
 A few more things to get into the ground, or at least into larger pots.
  Here's a snapshot of the garden. I'm rather embarrassed, I mean, it looks so weedy. It's much more organized-appearing in real-life, I promise. You can see my potting-up station, with the wheel-barrow of freshly-mixed potting soil.
This evening was most glorious in the garden, with a thunderstorm blowing in; cool/warm, humid gusts of wind; the air full and active. I felt quite energized and was able to get quite a few things into the ground before hunger drove me indoors. Despite some cloud rumblings & a few ionic flashes, the drenching cloud-burst never quite occurred. I'll just have to keep on watering.
Monday, March 9, 2009
Let's Felt a Cat Toy!
 Li'l B loves to chase a ball (when she's in the mood, anyway). She especially likes the balls that make a sound.
Since she chases, but doesn't yet understand the concept of "fetch", I've made her lots of balls (less chasing for me).
Here's one way:
You'll need wool fleece or roving, jingly bells, nylon stocking.
Li'l B loves to chase a ball (when she's in the mood, anyway). She especially likes the balls that make a sound.
Since she chases, but doesn't yet understand the concept of "fetch", I've made her lots of balls (less chasing for me).
Here's one way:
You'll need wool fleece or roving, jingly bells, nylon stocking.
 First, put a handful of fleece in your hand.
Place a couple of bells on the fleece.
Then place more fleece on top of the bells. Wrap some more
First, put a handful of fleece in your hand.
Place a couple of bells on the fleece.
Then place more fleece on top of the bells. Wrap some more fleece around it all, forming sort of a ball and compressing it with your hands. I usually save the pretty, colorful wool for the outer layer.
Sometimes, at this point, I'll wrap some wool yarn around the ball, to sort of hold it together. I like to leave a short length of yarn dangling;
fleece around it all, forming sort of a ball and compressing it with your hands. I usually save the pretty, colorful wool for the outer layer.
Sometimes, at this point, I'll wrap some wool yarn around the ball, to sort of hold it together. I like to leave a short length of yarn dangling; it will felt up and make a nice tail to hold the ball by.
When you've got enough wool squooshed together, hold it tight in your hand and slide it into the toe of a nylon stocking.
it will felt up and make a nice tail to hold the ball by.
When you've got enough wool squooshed together, hold it tight in your hand and slide it into the toe of a nylon stocking.

 Tie a knot, enclosing the wool in the nylon. You can make several at once, just keep stuffing the wool in and tying knots in between.
At this point, you can either felt it by hand or in the machine. I usually opt for the machine; just toss it in with a load of laundry.
To felt by hand, stand at the sink with a bowl of hot water. Dip the wool ball in the water, squirt a small amount of soap on the ball, and start to knead and squeeze it, dipping in the hot water occasionally. Continue to rub and agitate the ball until it is felted the way you'd like it to be. This may take some time to get the ball nice and firm.
Tie a knot, enclosing the wool in the nylon. You can make several at once, just keep stuffing the wool in and tying knots in between.
At this point, you can either felt it by hand or in the machine. I usually opt for the machine; just toss it in with a load of laundry.
To felt by hand, stand at the sink with a bowl of hot water. Dip the wool ball in the water, squirt a small amount of soap on the ball, and start to knead and squeeze it, dipping in the hot water occasionally. Continue to rub and agitate the ball until it is felted the way you'd like it to be. This may take some time to get the ball nice and firm. When your ball is all felted, use sharp scissors to snip and peel away the nylon.
 If your kitty enjoys catnip, you could do a final soak of the ball in a strong batch of catnip tea, then let it dry. I like to put some dried catnip in a paper bag, place the balls in the bag, and let them infuse with the catnip for a few days.
Our favorite family game is me at one end of the house, Rick at the other end, and Li'l B in the middle. We humans take turns bouncing or rolling the balls past the cat, while she jumps, chases, hides, and finally stretches out on the floor to take a nap.
If your kitty enjoys catnip, you could do a final soak of the ball in a strong batch of catnip tea, then let it dry. I like to put some dried catnip in a paper bag, place the balls in the bag, and let them infuse with the catnip for a few days.
Our favorite family game is me at one end of the house, Rick at the other end, and Li'l B in the middle. We humans take turns bouncing or rolling the balls past the cat, while she jumps, chases, hides, and finally stretches out on the floor to take a nap.
Sunday, February 22, 2009
My Furry Friend
 Well, the knitting photos didn't turn out as spectacular as I'd hoped. So rather than blathering on about my recent knitting feats, today I'll introduce you to a most wonderful feline companion. (but stay tuned for exciting knitting news soon!)
Please meet Li'l Baby.
Well, the knitting photos didn't turn out as spectacular as I'd hoped. So rather than blathering on about my recent knitting feats, today I'll introduce you to a most wonderful feline companion. (but stay tuned for exciting knitting news soon!)
Please meet Li'l Baby.

Subscribe to:
Posts (Atom)